Wednesday, October 5, 2011
Creative Paperclay Halloween Ornament
I love Paperclay! I decided to create a Halloween ornament...well, a bunch of ornaments. I love Halloween and below is the step-by-step on how I made this Jack-o-lantern ornament.
Supplies:
Creative Paperclay
Aluminum foil
Wire
Wire clippers
sculpting tools (you can use anything available)
Acrylic paint and sealer
Pasta Machine (if you have one)
or rolling pin
Gesso
Fine grit sandpaper
Bamboo skewer
Water
Soft Paint brush
To Get Started:
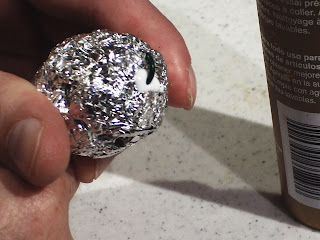
Take a piece of aluminum foil (or you can use a styrofoam or paper maché shape) and make a basic ball shape. Take a bamboo skewer or ice pick and gently pierce the shape so you can run the wire through the ball. Make a small hook at the end of the wire (this will be on the bottom of your shape) and glue it to the bottom of the shape.
Break off a little less than 1/6th of an 8oz brick of Paperclay and roll out (or thickest setting on the pasta machine) so that it is around 1/8th inch thick or so. This will give you plenty of room to mold your face and the sections of the pumpkin. Apply glue to the shape to help hold the Paperclay.
Wrap the Paperclay around the object. If you have air bubbles, you may use a toothpick to poke a little hole in the Paperclay and gently press out the air. (Keep in mind that Paperclay will start drying as soon as it is exposed to air. Keep all unused Paperclay in a sealed container. I used a ziploc bag.)
Wet your fingers slightly and use enough water to smooth all the seams together and start making your final shape without it being soggy.
Add features like the face and segments with your sculpting tools. I used a dowel end to make the eyes and a cap to make the crooked smile.
Use a wet, soft paint brush to smooth out any tight places that are hard to smooth with your fingers.
Next, let your piece dry for a few days to make sure it's completely dry. (Note: some artists will bake their pieces in the oven at a low temp to speed up the drying process. Please make sure that the material you use inside your piece can go in the oven. Aluminum foil is good....plastic/styrofoam is bad. :)
Once dry, sand your piece and wipe all the dust off. You may want to put a coat of Gesso on first to give your paint a less-absorbent surface. I like to tint my gesso with a little acrylic paint. This makes the final coat go on quite nicely.
Let it dry completely and then paint your piece with the final colors you've chosen. When dry, you can use a paint-on sealer or a spray sealer. Let the sealer dry and then you're ready to hang your new ornament on your Halloween tree or package it up for a gift!
For more information on Creative Paperclay, please click HERE and you can visit their blog by clicking HERE.
Subscribe to:
Post Comments (Atom)


great project and amazing directions. thanks for your submission for the Paperclay DT
ReplyDeleteTotally awesome!
ReplyDelete